
As a snail farmer, you probably already know how important it is to treat the soil for snail farming.
Even if you are new to snail farming, soil treatment is fundamental to the success of your snail farm.
Soil is a major factor in any type of snail housing construction.
If you don’t treat the soil properly before stocking the snails, you may expose the snails to several pest attacks.
As more insects attack your snails, you will continue to count losses in your snail farm.
So, in this article, I will be showing you how to choose the best type of soil for snail farming.
In addition, you will learn the reasons why you need to treat the soil in your snail farm regularly.
Finally, I will be exposing you to five (5) very effective methods of treating soil for snail farming.
Most of the methods I will be showing are easy to do and will cost you close to nothing to treat the soil in your snail farm.
Before you go to the different methods of treating the soil in your snail farm, here are some reasons to do so.
Table of Contents [hide]
- Why do I need to treat the soil for snail farming?
- Benefits of treating the soil for snail rearing
- How to choose good soil for snail farming
- What then is the best soil for snail farming?
- Some Characteristics of Loam soil that makes it the best soil for snail farming
- What then is the best soil for snail farming?
- What are the different methods of soil treatment for snail farming?
- 1. The use of organic pesticides that decompose in the soil
- How to treat soil with organic pesticide for snail farming
- 2. Soil treatment for snail farming by heating
- How to treat the soil by cooking it in a pot
- How to treat soil by burning openly
- 3. Soil treatment using wood ash
- 4. The use of hot boiling water
- How to treat the soil for snail farming using hot boiling water [Technique 1]
- Technique 2 using hot water
- 5. Bonus tip – Treat dried plantain/banana leaves before introducing them in the pen
- 1. The use of organic pesticides that decompose in the soil
- Conclusion
- Other important snail farming resources
Why do I need to treat the soil for snail farming?
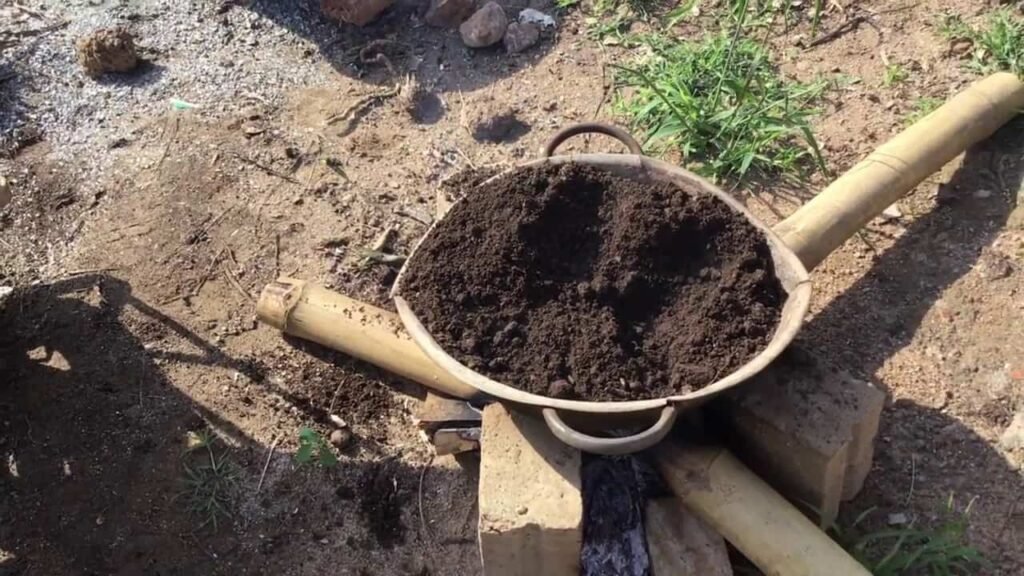
As you already know, the soil is an important factor in snail farming.
Snails carry out a lot of their daily activities on the soil.
They feed and sap most of the water they need from the soil.
Snails their eggs in the soil and they also dig into the soil to rest during the dry season.
With all of these activities, you can already see how vital the soil is to them.
But there is a huge problem with having soils in your snail farm.
The soil is also a fertile medium where harmful organisms; insects and pests thrive in.
When you allow these organisms to thrive, they attack your snails and ultimately kill them.
Hence, the need to treat your soil to get rid of those harmful organisms.
Benefits of treating the soil for snail rearing
- It keeps the soil free of harmful insects such as ants, bugs, centipedes, termites, etc.
- Also, treating the soil helps to protect the snails from germs and infectious diseases.
- This is vital because there is no known treatment for snails when they are sick or infected with a disease.
- Treating the soil ensures healthy growth of snails.
- Snails need a toxic-free environment to be able to lay more eggs.
- When you treat the soil in your snail farm, you reduce management cost and increase profit.
- Proper soil treatment reduces mortality in snail farming.
- Regular soil treatment also ensures that your farm is clean and hygienic all the time.
Now that you know how important the soil is in snail farming, let’s also see how to select the best soil for snail farming.
How to choose good soil for snail farming
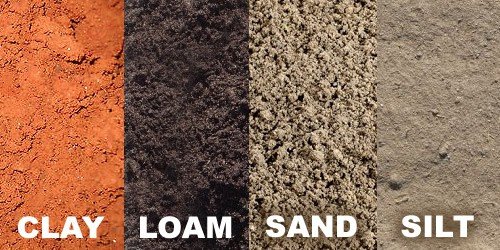
When choosing the soil for snail farming, you need to consider what’s best for the snails.
Generally, snails don’t like to stay in waterlogged areas.
As a result, clay soil is not a good recommendation.
This is because clay soil becomes waterlogged in the rainy season or when you water the snail farm.
On the other extreme, the soil dries up and becomes compacts in the dry season.
Therefore, making it almost impossible for your snails to dig into the soil.
If you are considering sandy soil, then that would be another bad decision.
That’s because the soil has a low water holding capacity.
Therefore, the soil cannot hold enough water for your snails which is a big problem in snail farming.
For some farmers, they opt for the sandy-loamy soil, which is still good.
Sandy-loam is a mixture of silt, sand and clay but having more sand proportion in it.
What then is the best soil for snail farming?
The best type of soil for snail farming is the Loamy Soil.
This is because loamy soil contains more decayed organic matter than other types of soil.
The organic matter in loam soil enhances the growth of the snails as they retain some helpful nutrients.
Some Characteristics of Loam soil that makes it the best soil for snail farming
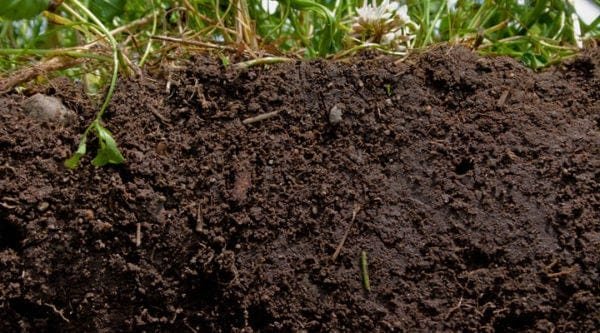
Loamy soil is the best soil for snail farming because it has good characteristics that are fit for snail development.
- The amount of sand in loam gives it the ability to drain well.
- At the same time, loam soil holds water better than sandy soil types because of the level of clay particles.
- Loamy soil better absorbs rich nutrients like calcium which is very good for snails.
- Because loamy soil is not to compact, it easy for snails to lay eggs in the ground.
- The loam soil is not acidic which can otherwise be harmful to snails.
Generally, loam soil provides a good environment for the snails to thrive.
So, when selecting the soil for your snail farm, you should look out for these characteristics.
Because you are not a soil specialist, you may find it difficult to spot these loam soil characteristics.
So, to make it easy for you to identify good loam soil for snail farming, this tip will help you.
Look out for any loamy soil that supports the growth of tomatoes, cocoyam, and leafy vegetables.
These plants grow well on loamy soil, now it’s easy for you to identify.
But it is not just enough to just get some loamy soil from a garden near you, put in your pen.
It will be disastrous if you do that and immediately introduce your snails to it.
This brings us to the part where you need to treat the soil to kill all harmful organisms it holds.
There are several methods of treating the soil before introducing the snails.
You will learn the best methods of soil treatment in the next heading.
What are the different methods of soil treatment for snail farming?
Now that we are here, I will be showing you some of the best methods of treating soil for snail farming.
These methods, plus the tips I will share, will kill off all the living organisms in the soil before you introduce them in the pen.
Some of the methods may take a lot of time while others may just be easy.
The goal is to ensure you treat the soil properly, kill all germs and provide your snails will a pest-free soil.
So, here are the different methods you can use to treat the soil for snail farming.
1. The use of organic pesticides that decompose in the soil
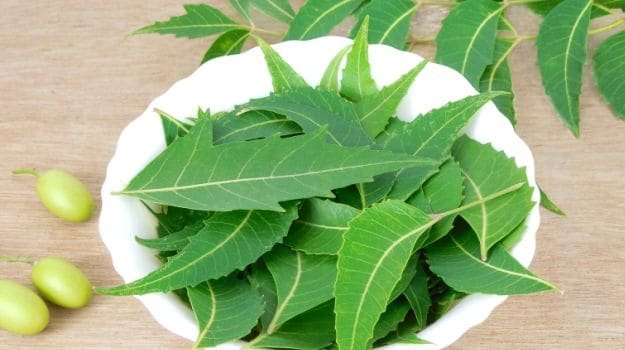
The first method I recommend for treating the soil for snail farming is the use of organic pesticides.
Mind you, it must be an organic pesticide which will decompose in the soil easily.
A a very good example of an organic pesticide is neem oil or neem tea.
It is also known as ‘dogonyaro’ in the Nigerian Hausa language.
If you use chemical pesticides, it may hurt the snails or even kill them eventually.
Also, you must moderate the use of organic pesticide.
Even though they help to kill insects larvae and other organisms in the soil, too much of it can also be harmful.
To treat the soil with an organic pesticide, this is the steps to follow;
How to treat soil with organic pesticide for snail farming
- First, find a good location to collect good loam soil.
- Using a shovel or any other appropriate snail farming equipment for clearing vegetation to clear the site.
- After that, collect some loam soil with a shovel and transport it using a wheelbarrow or headpan to the farm.
- Spread a large sack or nylon on the ground and then pour the loam soil on it.
- Use the shovel again to spread the soil on the nylon
- Next, spray the entire surface of the spread loam soil with the organic pesticide using a knapsack.
- Again, use the shovel to mix the soil to ensure that the pesticide gets into the soil.
- If you have another large sack or nylon, use it to cover the soil for at least 5 – 8 hours before introducing it into the pen. If you can’t cover it, it’s okay to still leave it open.
- Allow the soil to stay in the pen for at least 24 hours before stocking with snails. Spray some water to wet the soil before stocking.
2. Soil treatment for snail farming by heating

This is, in fact, one of the best methods of treating the soil for snail farming.
We all know that fire is one of the most destructive elements in nature.
As a result, heating the soil helps to destroy every living organism or eggs in it.
When it comes to treating the soil with heat, there are two ways to achieve that.
- By cooking in a pot or drum
- The other method is by burning the soil openly
These two methods depend on the quantity of soil you want to treat and how much patience you have to do so.
How to treat the soil by cooking it in a pot
When using this method of soil treatment for your snail farm, make sure you follow these steps;
- Firstly, you need to get the necessary materials for carrying out this operation. The materials include; a big pot or a metallic drum, some firewoods for making fire, and a tripod for placing the pot.
- Gather some firewoods and make a big fire with the tripod in place.
- Place the big pot or metallic drum on the tripod.
- Get the loamy soil from a farm or land that has green vegetation and pour into the pot.
- Next, allow the soil to heat up in the pot while you ensure that the fire keeps burning.
- Using a long wood stick, aluminium spoon, or shovel, continue to stir the soil in the pot to ensure that the heat spreads throughout the soil.
- When the soil becomes very hot and the heat is uniform in the pot, bring it down from the fire. Alternatively, you can use the shovel to scoop the soil from the pot into a wheelbarrow or headpan.
- After scooping enough soil into the wheelbarrow, transport directly into the snail pen. Make sure you transfer the soil while it is still very hot.*** If you allow the soil to cool first, insects may lay their eggs in it again and render your efforts useless.
- Next up, cover the snail pen and allow the soil to cool in it for 24 hours.
- Lastly, water the pen properly and then introduce the snails into the pen.
*** Please make sure you are using wooden hutch boxes or trench pens so that the hot soil does not melt your materials.
If you are using plastics for your snail housing, you can allow the soil to cool for a while before introducing it.
How to treat soil by burning openly

If you don’t have the time and patience to cook the soil in batches, then you can do it all at once.
This method especially applies when you have a very large volume of soil to treat.
The number of steps to follow is very easy.
- First, get the quantity of loam soil you need and heap them just outside the snail farm.
- Use a shovel to open the centre of the heap to create a hole in it.
- Next, fill the hole with firewoods and set it on fire.
- Allow the soil for heat up very well for some hours while you keep it burning.
- When the soil becomes hot enough, use a shovel to scoop the hot soil from the sides.
- Make sure you don’t allow the soil to cool before you start transferring into the pens.
- Let the soil cool in the snail pen for 24 hours, then you water it before stocking the snails.
3. Soil treatment using wood ash
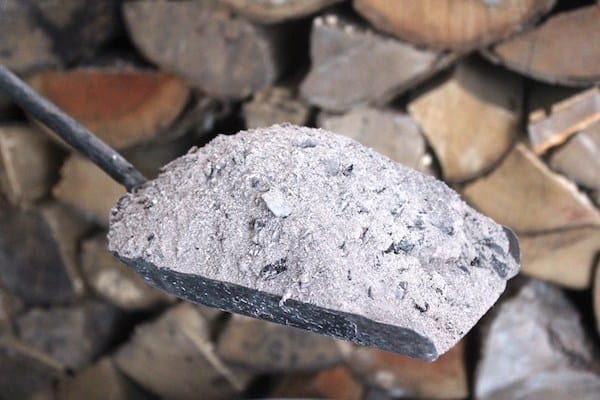
This method if soil treatment for snail farming is very easy to do.
The process is almost the same as that of method 1 above that involves the use of organic pesticides.
The only difference is that instead of applying organic pesticides to the soil, you will have to apply wood ash.
- After applying the wood ash, mix the soil thoroughly with a shovel and leave for 5 – 8 hours.
- The next thing you have to do is to scoop the soil from the mixing point into the pen.
- Spray some water on the soil and leave until the next day.
- On the next day, spray some more water on the soil again and then introduce the snails into it.
4. The use of hot boiling water
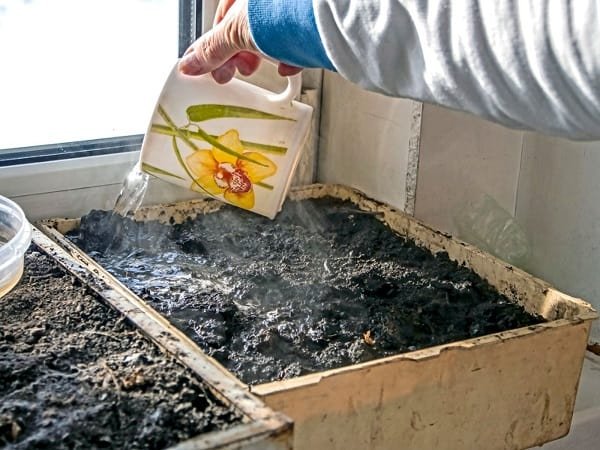
Treating the soil for snail farming using hot boiling water is also an efficient method of soil treatment.
Hot water can penetrate through the soil to kill any insect larvae or germs.
There are two ways of using hot boiling water to treat the soil and I will be showing you how to use the methods.
How to treat the soil for snail farming using hot boiling water [Technique 1]
This method of soil treatments is very cheap and easy to do. To treat the soil using hot boiling water, follow these steps;
- Get the necessary materials for the operation. You need firewoods, a tripod, a very large pot or metallic drum and some large plastic basins. You also need some sacks for the first technique of soil treatment using hot water.
- Gather some firewoods and make a big fire with the tripod in place.
- Place the big pot or metallic drum on the tripod and fill it with water.
- While the water is heating up, fill loamy soil into the sacks until they each bag is half full.
- When the water starts boiling, scoop some of the water into the plastic basins until they are ¾ full.
- Next, submerge each of the sack containing loam soil into the hot water in the plastic basins.
- Let the soil stay in the basin for about 5 – 10 minutes.
- Remove the sack from the basin of hot water and then drain the water.
- Now your soil is as good as new. Offload the soil from the sacks into the pen and then introduce the snails when the soil becomes cool.
Technique 2 using hot water
The second technique of treating the soil with hot water involves the following steps.
- Instead of filling sacks with the loam soil, load the soil directly into each section of the snail pen.
- Next, using a large plastic bucket, scoop a large quantity of the boiling water and empty it directly in the snail pen.
- Close the pen after that and allow to settle for 24 hours.
- Make sure you don’t pour too much water so that the soil can drain properly within 24 hours.
- If the soil is still waterlogged after 24 hours, allow it to stay for some more hours to ensure it’s conducive for the snails.
5. Bonus tip – Treat dried plantain/banana leaves before introducing them in the pen
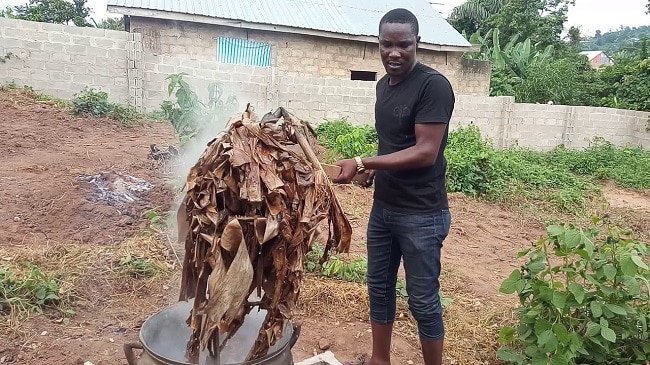
Even after treating your loam soil properly using the four methods above, you need to also treat
the dried plantain/banana leaves.
If you miss this process, you may render all your effort in soil treatment useless.
The reason for treating the leaves is because some insects often lay their eggs on the leaves.
So, by introducing the leaves into the pen without treating, you will be introducing the insect eggs and larvae as well.
In order to prevent this from happening, follow these steps to treat the dry leaves.
- Boil some water using a very large pot.
- While the water is still boiling on the fire, squeeze in some leaves into the pot.
- Use a long stick to press and stir the leaves.
- Continue to stir until the hot water touches every part of the leave and make it weak.
- After about 2 – 4 minutes of doing this, use the long stick to remove the leaves from the pot.
- Take the leaves to the pen area and spray it on the cover of the pen.
- Please, make sure there are no snails in the pens so that the dripping hot water does not affect them.
- After 20 – 30 minutes of spraying the leaves, clear them from the top of the pens and put inside each pen.
Conclusion
As you already know, soil treatment is very important in snail farming.
This article shows you the step by step process of treating the soil properly before stocking with snails.
Just to give you a recap, here are the different ways to treat the soil for snail farming
- Use organic pesticides
- Treat the soil by heating it
- Mix the soil with wood ash
- Soak the soil with hot boiling water
- Finally, Treat the dried leaves before adding it to the pen
I hope these different techniques help you to better treat the soil for the snails.
So, I will like to know what you will do after now.
Which of these methods are you going to start using immediately to treat your soil?
Are you going to use the heating method or the hot water technique?
Let me know in the comment section below.
If this article was helpful to you, please click on the social media buttons on your screen to share it everywhere.
Thanks.
Source: agro4africa


